Unlock Advanced Reporting with Your 360 Camera and ispecX
Enhance your 360° image quality and maximize the impact of your ispecX reporting system—with the right lighting setup.
Why Lighting Matters
Capturing professional 360° images isn’t just about the camera. Proper lighting ensures your inspections and reports are clear, detailed, and visually compelling. Without it, shadows, glare, and poor exposure can reduce the effectiveness of your documentation.
The BUSHMAN Advantage
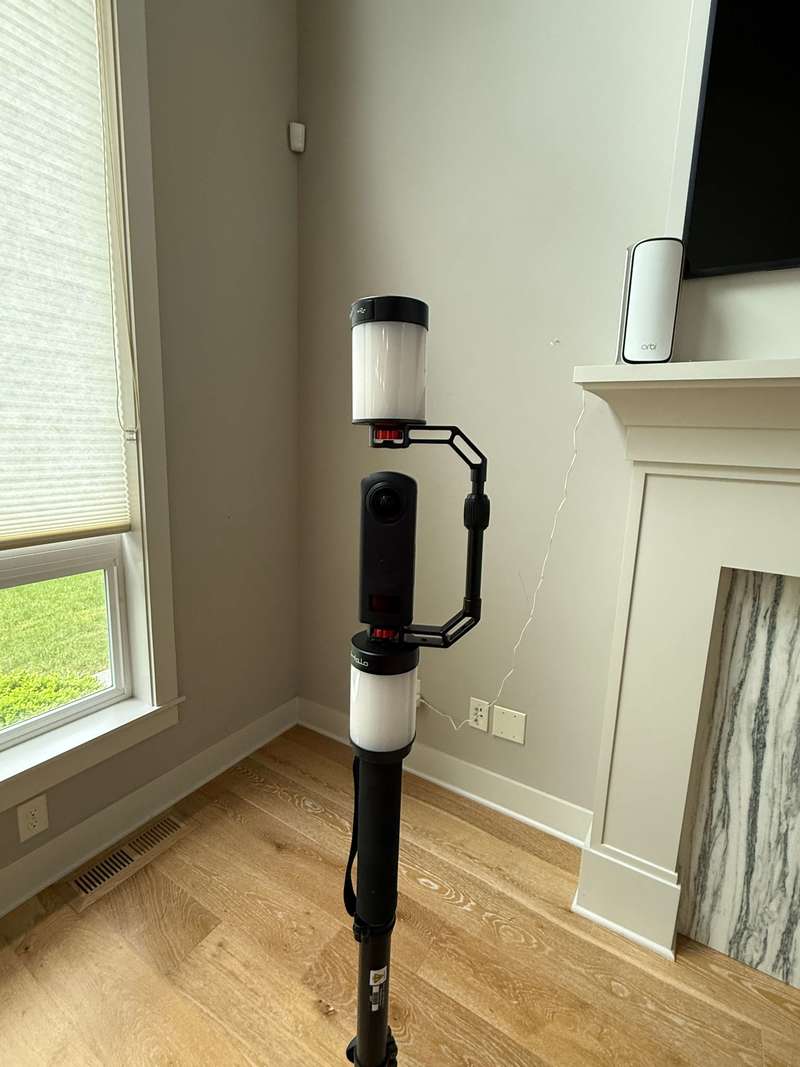
That’s why we recommend the BUSHMAN lighting system. Compact yet powerful, this light delivers 755 lumens and fits discreetly beneath your 360° camera—so you get professional-quality images without distraction in your shots.
Key Benefits:
-
Discreet Mounting – Use the included 1/4" spacer to position the light neatly under your 360° camera and minimize its footprint.
-
Powerful Output – With 755 lumens, you’ll capture sharp and vibrant inspections, even in dark attics, crawlspaces, or basements.
-
Full Control – Adjust brightness across five power levels for perfectly lit images in any environment—from small residential spaces to large commercial interiors.
💡 Pro Tip: Make sure the lens faces outward from the bracket to avoid the bracket appearing in your photos.
Smarter Inspections, Stronger Reports
When properly lit, your 360° images integrate seamlessly into your ispecX reports, giving clients crystal-clear documentation of property conditions. This not only improves accuracy but also elevates the professional impact of every report you deliver.
Lighting Options Compared
| Feature / Tool | Built-in Camera Light | Handheld Flashlight | BUSHMAN Lighting System |
|---|---|---|---|
| Brightness (Lumens) | 50–150 | 300–600 | 755 high-output |
| Even Light Coverage | ❌ Uneven, shadowed | ❌ Limited angle | ✅ Full 360° coverage |
| Hands-Free Operation | ✅ Built-in | ❌ Must hold | ✅ Mounted under camera |
| Visibility in Photos | ✅ Hidden | ❌ Can appear in shots | ✅ Discreet with spacer |
| Adjustable Power Levels | ❌ None | ❌ Few options | ✅ 5 levels for full control |
| Portability | ✅ Compact | ❌ Bulky in field | ✅ Lightweight, inspector-ready |
| Professional Quality | ❌ Low | ⚠️ Inconsistent | ✅ Clear, vibrant results |
✅ Winner: BUSHMAN Lighting System — Built specifically for 360° inspection workflows.
Frequently Asked Questions
Q: Do I really need a lighting system if my 360° camera already has a built-in light?
A: Built-in lights are often too weak and uneven for professional inspections. The BUSHMAN system provides consistent, high-lumen output that eliminates shadows and enhances clarity.
Q: Will the light show up in my 360° photos?
A: No—when mounted with the included 1/4" spacer, the light sits neatly beneath the camera and stays outside the stitched image footprint.
Q: How long does the light last on a single charge?
A: Battery life depends on brightness level. On most surveys, it lasts an entire workday without issue.
Q: Can I adjust brightness in dark crawlspaces or brightly lit commercial areas?
A: Yes—the light offers five adjustable power levels, giving you flexibility for any inspection environment.
Q: Is this system portable and easy to use in the field?
A: Absolutely. The unit is compact, lightweight, and built for field inspectors who need quick setup and reliable performance.
📌 Final Takeaway
Better Equipment Produces Better Reports
Clearer images = stronger documentation, higher client confidence, and a true competitive advantage.