Blog

IRC Code Air Balance Report Template

Air Balance Report Template

Recording the right air balance test results is a top priority for any HVAC company. Having a simple, straightforward air balance report template makes that a whole lot easier. 

Our HVAC air balance template contains:

  • Step-by-step instructions for data entry
  • Record all the info you need for service and customers
  • Printable and emailable report for your records
  • Customer Project Dashboard
  • Customizable template for your client’s reporting requirements
  • List project information, including the address, calibration date, and testing instruments.
  • Document equipment information, such as manufacturer, model number, serial numbers, and technical design data specifications, like fan speed data.
  • Check the HVAC system and components, such as the air handling unit (AHU), filters, coils, and the terminal unit, also called Variable Air Volume (VAV) or Constant Air Volume (CAV) boxes

Mighty Call IspecX Intergration for VOIP Phone System

Ispecx now has complete integration with Mighty Call VOIP phone system. All calls and text messages called into your business get logged with the appropriate contact. All of your communication is now in one place!

SMS communication is also logged! No more wondering if a text message was sent or received by a client. Might Call Notes system is also logged with all clients.

Your call logs can also be searched with a specific date range as well.


ispecX Mighty Call API is a simply copy-and-paste lice code that enables complete communication control. 

API Key for your account

To use API methods you will need a unique API key that identifies you as a service user. This can be found under the Intergrations Tab in the Mighty Call Dashboard.

IspecX Phone system API

Managing your customer call with ispecX

Integrated call logs with all the necessary follow-ups, including messages, voicemails, and even voicemail transcriptions, with available metrics, are requisites for a manager. This creates a conclusive and complete workflow, all in the ispecX platform.


Some of the Features are

  • Click to call

Make and receive calls without switching between platforms. Choose a contact and click the call button to start a call through MightyCall or Ring Central.

  • Improved call logs

Your dashboard allows you to view the entire history of customer interactions, including missed and received calls, voicemails, and call recordings.

  • Advanced Analytics

Integrated MightyCall / Ring Central call data now provides extra insights about clientele and team performance, allowing you to focus on weak points.

  • Top-notch communication management

Leverage the combined power of the two apps’ databases to personalize your conversations. Automatically match existing contacts, create new ones, and gain instant access to a contact’s card with highlighted details about previous interactions and notes left by you or your colleagues.

  • Enhanced team productivity

After the two services are integrated, users don’t have to switch between platforms, which lets them manage their entire customer lifecycle, including inbound marketing, sales, and customer service, all within a single platform. This streamlines communication workflows and saves time by allowing team members to focus on their core tasks without interruption.

  • Advanced reporting and analytics

The integration provides users with powerful analytics and reporting tools to gain insights into their communication performance, track call activities and outcomes, and make data-driven decisions for effective management.

  • Best customer service

The advantages of the phone integration lead to improved customer relationships and better customer service at every touchpoint. Whether it’s a new or returning customer or your sales or support team, the VoIP integration ensures the best customer experience possible.


New Folders for Templates

Get Your Files Organized Today

Now it is even easier to manage all of your report templates with our new folder feature. Create as many folders as you needed to stay organized! 

Now how you organize the personal folder is mostly a matter of how you mentally divide up your business. A very basic split could be Environmental, Home Inspection, Residential, Commercial, Energy Audits, and Radon.

There could then be a moderate amount of subfolders under these. 


Sample Report Layout Ideas - Understanding the power of CSS

Create Styles - simply add a 'Class' to your report page layout to instantly apply the created design. It's that easy!

Style 1

Table CSS with Code:

<style type="text/css">.border {
  border-style: solid;
background-color: #434343;
  border-top-style: outset;
  border-top-color: #7BB5C6;
  border-top-width: 7px;
}
</style>
<div class="border" style="font-size:20px;color:white;">&nbsp;Styles &amp; Materials</div>

<div style="margin-left: 40px;">Your text data here.</div>


Let's create a Style 2 with a different color header band.

<style type="text/css">.border {
  border-style: solid;
background-color: #434343;
  border-top-style: outset;
  border-top-color: #

<style type="text/css">.border2 {
  border-style: solid;
background-color: #6F6F6F;
  border-top-style: outset;
  border-top-color: #EAA708;
  border-top-width: 7px;
}
</style>
<div class="border" style="font-size:20px;color:white;">&nbsp;Styles &amp; Materials</div>

<div style="margin-left: 40px;">Your text data here.</div>

;
  border-top-width: 7px;
}
</style>
<div class="border2" style="font-size:20px;color:white;">&nbsp;Styles &amp; Materials</div>

<div style="margin-left: 40px;">Your text data here.</div>

Just adding a Border2 class will now apply the Orange border with lighter Gray background. Add as many class styles as you need!

TIP: If you want your borders to look sharp on high-resolution displays you can use thin instead of 1px :)

IspecX running slow? Here is the fix!

Clear cache & cookies on your device to improve the browser's performance

From time to time, our web developers make updates to the files that comprise website and web services in order to push a change or a new feature live. When a file that your browser has cached is changed, your browser will keep serving the old, cached version of the file and you won't see our most recent changes. Furthermore, you may encounter browser errors like run time errors or buttons missing on a page.

Clearing cache and cookies in your browser help fix these issues. Actually, clearing cache and cookies can significantly improve the speed and performance of your browser it will apply updates and get you running like new again!!!! 

Clearing Cache Memory

To ensure you see the latest version of a site you need to clear the cache memory. This is done by doing a force refresh by pressing both control and F5 buttons simultaneously on your keyboard (depending on your browser). Most times a simple force cache refresh won't work and you need to clear the cache by hand.

Depending on your operating system all you need to do is the following key combination:

Windows: ctrl + F5
Mac/Apple: Apple + R or command + R
Linux: F5

Cache and Privacy

Internet cache can threaten your privacy as everyone who has access to your computer can see some personal information by simply opening the cache folder.
Also when the cache fills up, performance can slow down and your hard drive may run out of space.

Internet Service Provider Cache

In the same way that your web browser has a cache of recent web pages, your Internet Service Provider (ISP) may be doing some caching on your behalf.

In some (rare) cases, even though you are using shift-refresh to get new data from a webpage, the pages still seem to be old. This may be because your Internet Service Provider also has a cache and their cache may not be set up quite right, and they are not downloading the latest web pages.

When you encounter this problem you will have to communicate with your ISP to fix this problem

This is how to clear your browser's cache and delete cookies depending on your browser:  ( We recommend using Chrome !!! )


Safari for iOS:

From the Home screen choose Settings > Safari, then tap Accept Cookies and choose "From visited", or "Always".

To clear all cookies from Safari, tap Settings > Safari > Clear Cookies and Data.


Android's web browser:

Open the Browser application.

  1. Select the Menu key.
  2. Select Clear cache.
  3. Select OK.
  4. Select Clear all cookie data.
  5. Select OK.


Windows Phone browser:

  1. From the Start Screen swipe the screen from right to left, Scroll down to “Settings” and tap it.
  2. Swipe the screen from right to left, to “Applications” then scroll down to “Internet Explorer” and tap it
  3. At the bottom of the screen tap “delete history”
  4. This will delete temporary files, history, cookies, and saved passwords that are all deleted from your Windows Phone. 


Google Chrome:

  1. Click the Chrome menu on the browser toolbar.
  2. Select "Tools".
  3. Select "Clear browsing data".
  4. In the dialog that appears, select the "Empty the cache" and "Delete cookies"
  5. Use the menu at the top to select the amount of data that you want to delete. Select "beginning of time" to delete everything.
  6. Click "Clear browsing data". 


Firefox:

At the top of the Firefox window, click the Firefox button, go over to the History menu and select "Clear Recent History...."

Select how much history you want to clear:

  1. Click the drop-down menu next to "Time range to clear" and choose "Everything"

  2. Next, click the arrow next to "Details" to select exactly what information will get cleared. Select "Cookies" and "Cache"

  3. Finally, click the "Clear Now" button and the window will close and the items you've selected will be cleared.  


Internet Explorer: 

  1. Select Tools > Safety > Delete browsing history...
  2. Make sure to uncheck Preserve Favorites website data and check both Temporary Internet Files and Cookies then click Delete.
  3. You will get a confirmation at the bottom of the window once it has successfully cleared your cache and cookies.

Reporting Invoice Template

INVOICE TEMPLATE

Invoice template basic recommendation.

Watermark: Add a transparent background image for the watermark image.

Header: Header upload a company logo image and set left justification.

Footer: Footer we recommend adding the company name, address, website, and email information.

Contact Info add a thank you ... ' We appreciate your Business!' message.

Or course the design is all up to you!! 

Commercial Reporting Software

PROPERTY CONDITION ASSESSMENTS (PCA)

ASTM standard E2018-15 Commercial reports made easy with ispecx software.

Property Condition Assessments typically include a review of the following information:

  • Construction plans, repairs/renovation proposals, records of capital expenditures and historical repairs, and estimated budgets for improvements.
  • Site features including parking and flatwork, landscaping, and site topography and drainage.
  • Roof coverings, flashing, expansion joints, drainage, and parapet walls.
  • Building material and finishes including construction framework, foundation, interior/exterior walls and doors, finishes, and windows.
  • Electrical systems including transformers, switchgear, distribution, and emergency power.
  • Plumbing systems including piping material, water heaters, and drainage.
  • Conveyance systems including lifts, elevators, and escalators.
  • Fire protection systems including suppression systems and alarms.
  • Utility connections, and refuse disposal.
  • ADA accessibility including parking, interior/exterior routing, restrooms, and elevators.

We provide both Property Condition Assessment (PCA) and Commercial Business Inspections (CBI) reporting features. Each has a specific purpose. Why shouldn't your software?

  • EMF Reporting 
  • Mold Assessments
  • Radon Surveys
  • Lead Paint Surveys
  • Asbestos Surveys
  • Commercial Inspection
  • Home Inspection
  • Side Sewer Survey Reporting
  • Home Inspections
  • Move-In Inspections
  • Property Management
  • PCA Inspections
  • Noise Ordinance Survey
  • Specialty Foundation Reports
  • Roof Inspection
  • PRV Inspections
  • Bank BOP Inspections
  • Home Maintenace Inspections

Ispecx understands the Inspection Industry!

Tips from the Pros: Creating Smart Report Templates

Report Template Tips

Observations:

  1. Create your Observation Layouts before adding or importing in any Observation Database
  2. Create the Conditions as a short description for the observation and carry over the longer explanation to the explanation field.

Reason: The Conditions field is used as search text for adding 360 observations and for search fields. So keep it short n sweet.

You can check your conditions fields easily in the list view to see what observation may need to be modified. As you can see in the sample image Air Gap comment is too long and should be modified for performance.

TAGS

Ad your Tags to your oberservstion to quicly assing these to report sections. Tags are used Globally so will work with every Template created saving hours of development time!


Lead Paint XRF Survey Software

IspecX new XRF import feature allows your company to create custom reports capable of full chart layouts. Add quick charting to your XRF Surveys allows companies to chart by paint condition, room, positive results, negatives, and more. Easy to add Operators and Data collection fields. Reports are easily organized and easier to understand by your clients. 

  • Custom report sections
  • Floor Plans
  • Flaggable Sections
  • XRF Import
  • Client Management
  • Auto Invoicing
  • Report Lock
  • ELB Section 8 Reports
  • Client Login Portal
  • Public Sharable Links
  • Secure Server / Protected Report Files

Learn more about our Asbestos, Mold, and VOC reporting software.
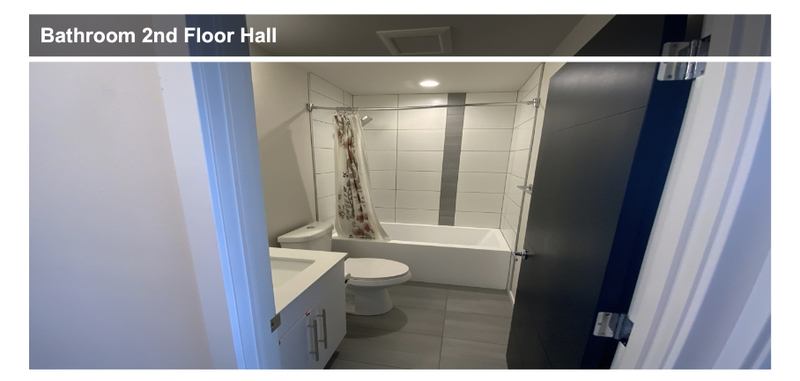
Observation Layout Examples

Creating an Observation layout for comments and deficiencies is easy. See some user examples below with code!

A clean color-coded layout

Paste code into layout:

<style type="text/css">.img_01 img{
max-width:275px;
height:auto;
border:1px solid #021a40;
border-radius: 5px;
padding: 5px;
margin: 5px;
</style>
<table border="2" bordercolor="#B5B5B5" cellpadding="5" cellspacing="1" style="border-collapse:collapse;width:100%;">
    <tbody>
        <tr>
            <td style="width: 1%; background-color: #B5B5B5;">&nbsp;</td>
            <td style="width: 99%; background-color: #F9F9F9;">
            <div><strong><em><span style="color:#B5B5B5;"><span style="font-size:14px;"><img alt="" src="https://s3.amazonaws.com/ispecx-production/pnwig/ckeditor_assets/pictures/186/content_comment.png" style="width: 45px; height: 45px;" />{{ section_index }}.{{ sub_section_index }}.</span></span><span style="font-size:14px;"><span style="color:#B5B5B5;">{{ deficiency_index }} </span></span><span style="color:#B5B5B5;"><span style="font-size:14px;">{{ sub_section_name }}&nbsp;</span></span></em></strong></div>

            <div><span style="font-size:18pt;"><strong><span style="color:#8e44ad;">{{ system }} <em>&bull;&nbsp;{{ action }} &bull;&nbsp;{{ url }}</em></span></strong></span></div>

            <div>
            <hr /><strong><span style="font-size:14pt;"><span style="color:#000000;">{{ condition }}</span></span></strong></div>

            <div><span style="font-size:14pt;"><span style="color:#e67e22;">Location -<span style="color:#000000;">&nbsp;</span>{{ location }}</span></span></div>

            <div class="img_01">{{ graphic_images }}</div>

            <div class="img_01">{{ video_files }}&nbsp; {{ audio_files }}</div>

            <div><span style="font-size:14pt;"><span style="color:#000000;">{{ explanation }}</span></span></div>

            <div>
            <hr /><span style="color:#2980b9;"><span style="font-size:14pt;">Consequence -&nbsp;</span> {{ consequence }} </span></div>
            </td>
        </tr>
    </tbody>
</table>
 

---- Code End ----

Change the color, add icons, rearrange the layouts. Made it a shade of Red for safety issues, Blue for Monitor, Yellow for Comments...The Choice is yours! 

Setting Up Your Schedule Calendar

Under the Organisation's Admin user profile, you will find the Company Setting Tab.


Set the default Appointment time for when you the time you want the 1st available appointment.

Set the Pending Color Code to the color you wish to display on the calendar for all Pending Appointments.

Set the Public Link Expire time for when your want the shared public link used to access inspection reports to expire.

If your Organisation collects tax check the tax box and enter in the rate.


Inspectors Availability

Set your team's availability under the left dashboards Calendar Tab, select User Availibility.


Select an inspector to set the times they are available for inspections.

The number at the left of the inspector is the inspector's priority number. Inspectors with lower numbers will show on the calendar as a priority to fill. Once the inspector's priority is filled the next in line will show. You can set all inspectors with the same number to have all be as available if Priority is not needed. This allows the Senor inspectors to have full schedules over the new guys.

Adding Image Styles to Inspection Reports

Creating a full-page image header for your report layout is easy. Copy the code below and paste it into your section layout source code page.

<style type="text/css">@page { margin: 0 }
         * {box-sizing:border-box;
         -webkit-print-color-adjust:exact; 
         color-adjust: exact !important;}
         body { margin: 0; font-family: Arial, sans-serif;font-size:14px;}
         .sheet {
         margin: 0;
         overflow: hidden;
         position: relative;
         box-sizing: border-box;
         page-break-after: always;
         }

.img_coversection img{
width:100%;
height:455px;
  
}

         
         /*h2,h3,h4{ font-family: Arial, "Helvetica Neue", Helvetica, sans-serif; }*/
  
         @media print {
         * {-webkit-print-color-adjust:exact; 
         color-adjust: exact !important; /*Firefox*/}
         body.A4.landscape { width: 297mm }
         body.A4, body.A5.landscape { width: 210mm }
         }
         .fix{overflow:hidden;}
         p{margin:0;}
         h4{margin:0;}
         
         @page { size: A4 }
</style>
<section class="sheet padding-0mm" style="position:relative;"><!-- Main Start -->
<div class="main" style="font-family: sans-serif;font-size: 12px;overflow:hidden;width:100%;"><!-- Header -->
<div style="background:rgba(0,0,0,0.5);font-size: 41px;font-weight:bold;position: absolute;color: #fff;margin-left: 0%;border-bottom: 7px solid #fff;padding: 14px;display: block;width: 100%;line-height: 1;"><span style="font-size:26px;">{{ section_name }}</span></div>

<div class="img_coversection">{{ section_coverpage_image_macro }}</div>
<!-- content -->

<div class="fix box" style="margin-top:20px;font-size:14px;">
<div style="float: left;display: inline-block;overflow:hidden;">
<div>
<hr /></div>

<div> Macros and text can be placed here </div>

<div>&nbsp;</div>

<hr />
<div id="mntl-sc-block_1-0">{{ add_SubSection_macro }}</div>

<div>&nbsp;</div>
</div>
</div>
</div>
<!-- Main End --></section>
 

Data Collection

For the data collection image, you will need to add a new data field with an operator for the image. Images are best taken in landscape mode to better fit the image container.


Your report output will auto-insert the Section Title and provide you a very clean Section Title with an Image. You can easily adjust the height and title color/transparency header as well.


Bulk Image Layouts can be added just as easy Copy Paste and Edit !!

home inspection templates


<style type="text/css">.img_sp img{
width:375px;
height:225px;
border:1px solid #021a40; border-collapse: collapse;
border-radius: 0px;
padding: 0px;
margin: 1px;
}
img:hover { 
    cursor: zoom-in;
    opacity: 0.8;
}
</style>
<table border="0" cellpadding="1" cellspacing="1" style="display:inline; border-collapse: collapse;">
    <tbody>
        <tr>
            <td class="img_sp" style="text-align: center;position:relative;">
            <h3 style="background: rgba(0, 0, 0, 0.5); font-size: 21px; font-weight: bold; position: absolute; color: rgb(255, 255, 255); margin-left: 0%; border-bottom: 4px solid rgb(255, 255, 255); padding: 8px; width: 300px; display: inline-block; line-height: 1; text-align: left;"><span style="font-size:16px;">{{ image_caption }}</span></h3>
            {{ image }}</td>
        </tr>
    </tbody>
</table>


What is Advanced Conditions / Data Collection AC/DC ?

Being a Home Inspector is all about collecting data about the home or building's conditions. Ispecx has over 30 years of in-field Commercial and Residential building inspection reporting experience that went into the development of our AC/DC (Advanced Condition Data Collection) reporting system. Commercial and Residential Home Inspection reporting made easy.

So what can our AC/DC system do for you and how does it work? 

Collecting Data on a job site should be streamlined for accurate data collection and not have the inspector spend time flipping through unrelated data. That's where ispecx brings in our AC/DC field assignments where your template can have logical controls that will self populate the needed fields and hide all the others.

Think of it as a flow chart on steroids

The Home Inspection template can have section data collection fields assigned values to hide or show dependant upon other data collection values. For example, let's look at starting the report on the exterior of the home with the roof system. The roof on this inspection is composed of Wood Shake. We set the field data value for Roof_Material with the value of 'Wood_Shake'. Our next data collection field is now showing only the needed collection data for a wood shake roof only. So therefore Asphalt, TPO, Steel, Concrete, and other roofing material data is not relevant to this report and therefore is omitted to allow the inspector to view only the reporting data that matters. The inspector will now only see collection fields such as shake thickness, butt decay, and other common wood shake reporting fields.

As this AC/DC reporting template format gets applied to the entire reporting template you now have a very specific reporting system dedicated to only the data that matters!!

We didn't stop there! To speed the system along even faster we have created an observation system that applies this process to comments and deficiencies as well. Let's take a Water Heater for instance. Our water heater is 16 years old, we already know based on the age that this water heater is beyond the manufactures expected life so why would we need the onsite inspector need to continue with additional tasks to report this observation. Well, they don't! With our Smart Linking, our system knows that the water heater has a deficiency and inserts it automatically for the inspector. Smart link values can be added to ANY of the templates report data collection fields so your control is in your hands.

Home Inspection In a No Fly Zone?

Is your inspection in a no-fly zone?

Almost every Commercial or Residential home building inspector has a drone in their tool kit. Drones make inspections not only easier but safer. From the technical side, drones provide a way to inspect roofs that would otherwise be inaccessible. Often, a roof is inaccessible when it is too high, too steep, or too slippery to safely access ( especially commercial buildings ). Additionally, certain roofing materials, such as clay tile, or significant amounts of wear may inhibit an inspector from traversing the roof. So inspectors drone it. But what about the airspace?

Ispecx reporting software warns you of your scheduled appointment is in a no-fly zone or an altitude zone. This data is priceless when a drone inspection may be required for a tall building. Don't find out when you fire up your drone! Know before you arrive!!

Our System delineates where it is safe to fly, where flight may raise concerns, and where the flight is restricted. GEO zones that prohibit flight are implemented around locations such as airports, power plants, and prisons. They are also implemented temporarily around major stadium events, forest fires, or other emergency situations. Certain GEO zones don’t prohibit flight but do trigger warnings that inform users of potential risks.

By default, GEO limits flights into or taking off within zones that raise safety or security concerns.

The GEO system is advisory only. Each user is responsible for checking official sources and determining what laws or regulations might apply to his or her flight. 

Now Get that drone in the air and start Inspecting!!

As a dedicated Roofing Inspector this feature is a must have for our scheduling system.

Has saved us many times in crictical no-fly zones.

Mold Reporting Assessment Software

Standard Home Inspection software can not produce Mold Assessment Reports that the industry demands. 

Until Now.... that's where our new Mold Reporting Module has taken the demands of the insurance companies, real estate relocation services, banks, remediation companies, and home inspectors to create the most advanced mold assessment reporting software available in the market today.

Our software auto-completes your COC forms from the leading industry labs making mailing samples painless.

The ASTM D7338 IAQS Mold Reporting Environmental Health & Safety (EH&S) management software

Mold reports can be customized in any way your firm needs. With our simple placeholders charts can be added to your reports identity water damage indicators and allergens in simply to read charts.

Created by professional mold inspectors giving you more of the real needed data reporting capabilities. Our software collects CO2, PM, RH, Temp, Allergien data, and more.

  • Air-o-cells
  • Tape Lifts
  • Moisture Readings
  • Humidity
  • Carbon Dioxide
  • Temperature
  • Water Damage Indicators
  • Particle Size Readings
  • Allergens
  • Thermal Differences
  • Data Charting

So what does your current software do with this data? Likely nothing. 

Understanding this data and how it needs to be presented in a report to a client is all about what our Mold Software does. Why has it taken so long?! 

Call or email us for a Demo Today of ASTM D7338 IAQS Template!!

AHERA Asbestos Reporting Software

Finally, an AHERA Asbestos Environmental Health & Safety (EH&S) management reporting software was created by AHERA Inspectors!

That's right, the Team at PNWIG Inspections Group has created a reporting system with IspecX Software that gives the Asbestos inspector the tools needed to collect samples and create an AHERA detailed report following the AHERA asbestos reporting requirements. Create your own Asbestos Forms or use our base template. The hard work has been done for you!

Reporting Asbestos Potential for a spill, affected areas, quantity, and adding conclusions to your report is made easy with our charting system. Conclusions are added from the library from a searchable drop-down list. Colorado and New Jersey Reporting requirements.

  • An asbestos building inspection and bulk sampling
  • Development of asbestos management plans
  • Air monitoring for asbestos fibers
  • Development of asbestos project designs
  • Project management

Some of the Asbestos Reporting features include:

  • Simple Lab Sample Import
  • True 360 Image Sample Plotting
  • Automated Sample Id placement 
  • Automated COC Forms
  • Sample Label Printing
  • Floor Plan PDF editor with Drag -n- Drop sample Ids markers
  • In Report Sample Charting for Both Positive and Less than 1% ACMs
  • Duplicate Sample Button
  • COC Template System
  • Conclusion Library
  • Room ACM Location Charting
  • Sample Description Charting
  • Create Asbestos Label Templates Inspection Forms
  • Public Share Link
  • Integrated Invoicing
  • Page Layout Code is Open Source
  • Prevent Duplicate Samples


Floor Plans are now no longer a struggle!

Just pick a room and then drag and drop the sample to the floor plan location!

The editor also allows easy placement of color transparent shapes to mark sample areas, group samples as well as add text.

Our Asbestos reporting templates can be fully customized to your company reporting specifications.

Full open-source template code allows every section of your report to be fully customized!

FINALLY, there are No longer restrictions within your Asbestos Forms.


Asbestos job photos have easy access with our integrated Google Drive Sync. Never lose a photo!


Importing your Lab Samples is easy with our Sample Import!

That's right a simple CSV file of your samples imports them all with one click!

Custom report charts with Positive, Less than 1%, and Non-Detect charting!! Our charts also can display with sample images or text only!


Print Asbestos Sample Labels onsite!

TIP FROM OUR USER: Of course, the IspecX system can send samples to a printer! but for small jobs, Pacific Northwest Inspections Group has designed a label and printed them on business cards for ease of use. Costing less than .02 cents a piece. Just use a sharpie and fill in the sample number, Great marketing tool as well!

Watch Our Asbestos Reporting Video and see it in action!!


Google Drive and Your Home Inspection Report

We’ve added Google Drive integration for those of you who want the ability to have your inspection documents all in one place!

Google Drive integration automatically creates a project folder related to your inspection so you can keep track of all related inspection documents & images that may not need to be inserted directly into your report. G-Suite Enteripse offers FREE unlimited storage for all of your inspection firm's storage needs!  (There is a free plan, but beyond that limit, you will be responsible for any of Google's associated costs. So why not sign up as an Enterprise user!)

Organization Admin can enable this feature under their profile and enter the Google Drive API code. Once enable a Google Drive tab will appear for all of your firm's inspectors and Office Admin. these documents can be views on your site or by visiting your Google Drive Account. Files are automatically 2-way Synced.

It's Just So Easy!

Custom Inspection Reports

Check out some samples of how you can customize your report.

CUSTOM CHECK BOX'S

Add colorized check box's where you can select the color of the box in checked mode and in unchecked mode.

CUSTOM TABULAR LAYOUTS

Set your color for unchecked and checked colors, unlimited possibilities!


CUSTOM TABLES


Making the transition from ISN to Ispecx

What are you waiting for? Ready to make the change from ISN to ispecx, we make it easy! Ispecx offers almost all the metrics that ISN offers at a much lower cost. Most of the features are ALL FREE. Moving over to ispecx easily pays for itself! 

We even have added more useful metrics than ISN offers to allow multi inspection firms the ability to check the stats of unlimited office locations all in one place. Our metric systems also work across multiple inspection firms branches so all your data is in one place!

ACC America's Call Center Software Integration

Ispecx Home Inspection Software is now fully integrated with ACC - America's Call Center, allowing you to spend more time inspecting and less time answering phones.

America’s Call Center (ACC) is the premier provider of integrated customer service & call handling solutions exclusively for the home inspection industry. ACC acts as a true extension of your home inspection business – a strategic partner providing the highest quality, personalized office support and collaboration to drive your business success.

Contact us or ACC for more information.

Guardian Financial Software Integration

Ispecx credit card processing with Guardian Financial Services. Home inspectors can easily accept payment on the same platform as their home inspection software.

Guardian Financial Services is a payment processor and merchant service provider. This type of account authorizes you to accept credit or debit cards online. They have worked with home inspectors and the industry for over 14 years. You contact their owners directly to walk you through the process and get set up.

We partnered with them for their superior service because they have access to the best rates from payment gateways like Authorize.net (payment gateways securely authorize payments for websites, much like physical point-of-sale terminals in retail stores).

Other details:

  • No contract
  • No setup fees
  • No cancellation fees
  • $10 monthly fee for the merchant account & gateway
  • Debit Transactions: 1.70%
  • Communication Fee: .30
  • Credit Cards: 2.69%
  • Rewards Cards and Corporate Cards 3.29%

HOW IT ALL WORKS TOGETHER

  1. Enable accepting payments through your ispecx account (Profile>Payment Settings)
  2. Call Guardian to get a merchant and Authorize gateway account set up that allows you to accept credit cards
  3. Link your Authorize gateway account to your ispecx account
  4. Make sure your booking emails include a link to your client’s ispecx dashboard
  5. You’re readily accepting payment before inspection!

Interested in learning more about accepting payment online?

Visit our partner page on the Guardian’s site to get started.

Speak with Guardian directly at 1-208-271-8715. Ask for Daniel Alanis and let him know ispecx sent you.


WA State Blower Door & Duct Testing Reporting Forms

IspecX Templates Specifically for Washington State

Blower Door and Duct Testing Forms

What is Washington R402.4.1.2?

The building or dwelling unit shall be tested and verified as having an air leakage rate of not exceeding 5 air changes per hour. Testing shall be conducted with a blower door at a pressure of 0.2 inches w.g. (50 Pascals). Where required by the code official, testing shall be conducted by an approved third party. A written report of the results of the test shall be signed by the party conducting the test and provided to the code official. Testing shall be performed at any time after creation of all penetrations of the building thermal envelope. Once visual inspection has confirmed sealing (see Table R402.4.1.1), operable windows and doors manufactured by small businesses shall be permitted to be sealed off at the frame prior to the test.

Ispecx has an integration of both Blower door and Duct testing RS-33 forms into our reporting software.
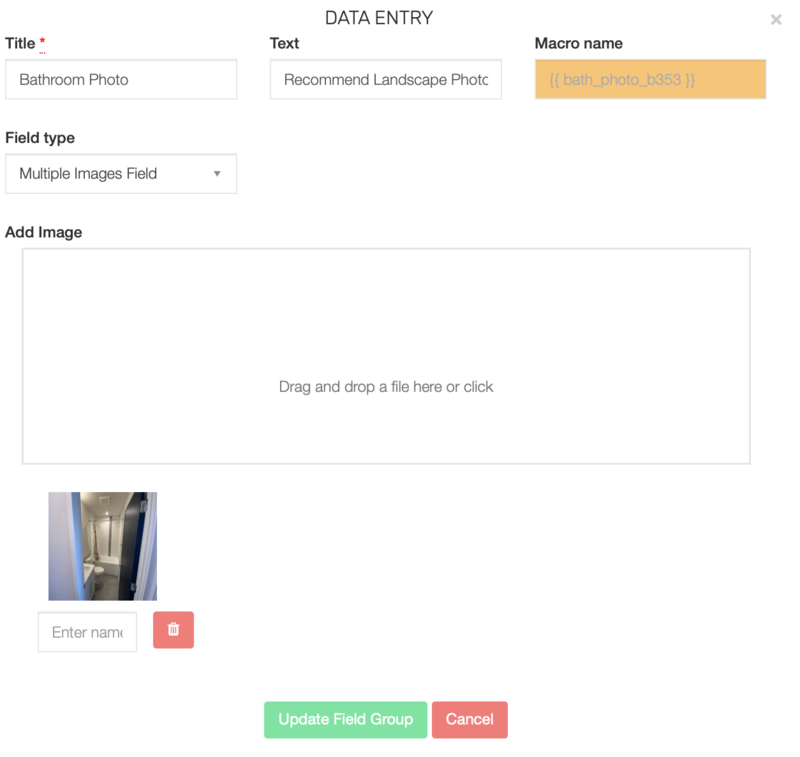
Yes, Reporting has just become easy!! Instantly email your test results!!


Washington State Testing Firms:

Pacific Northwest Inspections Group for Blower Door and Duct Testing 


Inspection Response Request Form

ispecX IRF System Editor

Our IRF(Inspection Response Form) editor lets agents quickly create and share a repair request document complete with photos, videos, and requests for repair, replacement, credit, or custom comment text. But wait!!! We are ispecX Home Inspection Software and are known for giving inspection firms the freedom of creation, Right?!

Take Control of the Home Buying Process with IRF

The valuable information we collect during our inspection will be sent to you just 24 hours later in a digital home inspection report. Reports generated using ispecX Software are meant to help you take control of the home buying process and the decisions that need to be made. In addition to the details, photos, and videos collected during our time at the property, each report also contains an interactive tool called the Inspection Request Form (IRF). The IRF helps you build a project list directly from the report, meaning that all of your requests can be easily shared with your realtor and seller. 

So there's more.
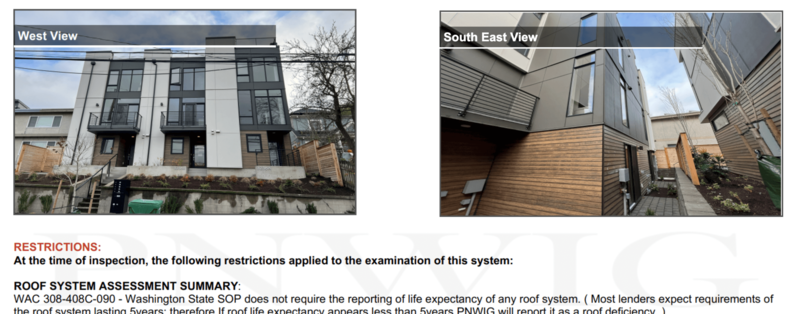
We have taken our system steps further by allowing you to create custom response editor layouts! Even your Brokers can use this editor to customize the layout!!! 

So what can this do for your Brokers and Clients?

  • Allows Agents to use/create custom Inspection Response Addendums
  • Allows Clients to use contractor bid request forms
  • Allows Clients to use Honey Do List forms
  • Unlimited Possibilities, it's up to you! So what are you going to create?


Accessing the Editor 

Log in and navigate to the left sidebar menu, under "inspections' click 'Repair Request Layouts'

From the Repair Request Layouts page, you can create as many layouts as you wish. These layouts are shared with ALL Brokers and Clients for use. Select a layout to edit or click the + plus sign to add new layouts.
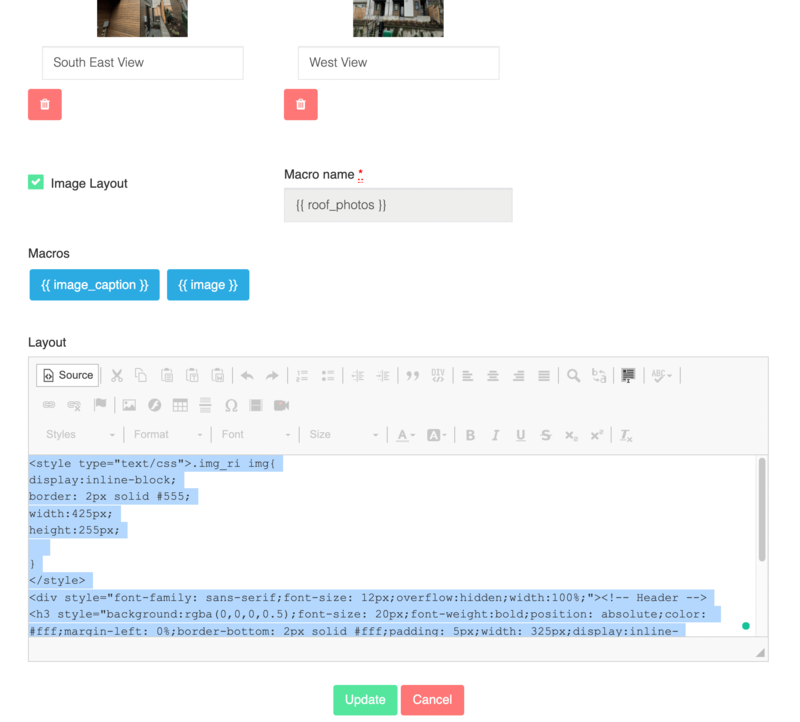
The layout editor is easy to use and has a large area of Macros to insert a placeholder for the inspection report data to populate.


We recommend getting familiar with the supplied templates and helping aid in your template design process. Questions just email us!!


Using the Request Form

Login to your inspection report and click the Request builder Tab, Select a Template and add report Deficiencies.

Preview form as a PDF file and then publish using the Create button. Forms are saved in a project and can be emailed out straight from the 'Create' button.


CHECK BACK TO WATCH OUR HOW-TO VIDEO... COMING SOON 

OneSource API Integration

Ispecx allows easy API report integration for OneSource giving your client a less stressful move while your business earns commission checks that can easily help pay for the ispecx software platform. It is a Win-Win:)

OneSource is your single source for connecting all of your home services AT NO COST to you or your clients! You select the services you need and OneSource will do all the work in getting them set up for you.

It's easy to add to ispecx, just contact OneSource for your API Key and enter it in your dashboard to activate automation.

Your Clients Get:

HOME UTILITY SERVICES INCLUDE

  • Telephone
  • Internet
  • Water/Gas/Electric
  • Satellite, TV/Cable
  • Smart Home Security System
  • Locksmith

IDENTIFYING PROVIDERS

  • They will IDENTIFY all of the providers that service your new move-in address for you.
  • You SELECT the providers that fit your needs.
  • They CONNECT the providers you select and send you the confirmation. The services they
    provide you, are FREE!

OneSource PROVIDES CONVENIENCE & VALUE

  • NO Researching Home Service Providers
  • NO Multiple Phone Calls
  • NO Long Hold Times
  • NO Trying To Determine the Best Deals
  • Make Selecting Services Easy
  • Save You Time and Money
  • Help You Make Informed Decisions

THE ONESOURCE GUARANTEES

  • OneSource will stay with you from the time they order services until the job is done – GUARANTEED!
  • Privacy Guarantee: They value your privacy. OneSource, a member of the Better Business Bureau with an A+ rating, will never share your personal information with anyone other than the service providers you select.
  • The Easy Utility Help Guarantee: If they miss a customer’s connection they will pay the first-month bill/invoice.


Learn More about OneSource


Easy Calendar sync with Google

Two-way syncing with our easy Google Calendar sync helps you stay organized and manage your schedule! Ispecx allows G-Sync from your calendar having it displayed across all your devices via Google Calendar Apps. With just one line of copy-paste code, your calendar is all ready to go for every member of your team!

So easy. So Convenient. So what are you waiting for?

How Will Automation Help Your Business?

Home Inspection Software

IspecX has a complete business automation solution for clients, agents, and inspectors. Multi inspector firms need automation to help run smoothly and communicate with customers and inspectors as well. Yes, you read that right, inspectors need updated communication just as important as the communication between your clients. Notification of appointment changes and reminders is essential in running a multi-inspector home inspection business and should not be the burden of the office staff with repetitive jobs.

Our automation doesn't just stop at emails but will even mail out hard copy invoices, postcards, and past-due notices. This is very important when inspection firms are dealing with commercial clients that pay invoices after receiving reports and services.

We have also an added feature exclusively for our members that will generate enough extra jobs that can easily pay for our software subscription alone! Contact Us for a FREE Trial Today !!


Setting up your SMS Text service

IspecX uses Twilio text management APIs. You're given a $10.00 account credit when you sign up here 

After you create your free account log in to your Twilio account and copy/paste in your API Key & Token in your ispecX Organisation Admin profile. This will activate your SMS text automation.


Make sure you have also set up your phone profile under Organisation settings (In your Profile Menu). Country code must be set for the system to work properly.

Youtube video not showing in online report?

Is your video iFrame showing YouTube error or Message Youtube will not play?

This is caused by the URL link format being a watch format, no worries it is an easy fix!

You must ensure the URL contains embed rather watch as the /embed endpoint allows outside requests, whereas the /watch endpoint does not.

<iframe width="420" height="315" src="https://www.youtube.com/embed/XFXGXFSF?rel=0&showinfo=0" ... >

Simply add the /embed into your watch URL and video should perform without any issue.


TIP: Add ?rel=0&showinfo=0 to end of your URL to remove Youtube video sugguestions !!

Adding your Credit Card Credentials

To accept credit cards with the Ispecx system any Authorize.net account will work. We recommend using our wholesaler account for the lowest possible rates.

Login to your Authorize.net account and navigate  to ACCOUNTS tab


Next, Click the API Credentials & Keys tab

Make a note of your API Login ID and generate a new transaction key

You will need to obtain an Authorize.net PIN number to proceed

After you enter in the PIN a new key will be created. Copy this key to use on your ispecx account dashboard credentials page.

To add your Authorize.net API keys login to the ispecx Admin dashboard and under Profile click the Account Settings Tab.


Insert the Authorize.net Login phrase into Login and the API key into the Login Key field. Click update Payment Credentials and you are ready to start processing credit cards on both the desktop and Mobil app.


Live Webinars

Upcoming Events: Ispecx Inspection Software Preview https://ispecx.clickmeeting.com/ispecx-inspection-software-preview Phone Participant PIN: 216752#

CPSC Recall Check

Free Recall Check

CPSC Recall Check

Checking your inspection appliances with CPSC is FREE, no additional cost for any of your users. Home inspection clients also have access to add new appliances to their home report and run the recall check API. Not only is this service integrated but this means you do not have to share your data with any third party service. Why should you have to pay to give out your clients information for recalls?


Inspection Reports Your Way

A successful inspection company does more than just the industry SOP Home Inspection and that is exactly why we had to create ispecX software, limitations were not an option.

We removed all restrictions giving the user a code-based template process that is easy to use and puts your company in the driver's seat. Any layout can be easily created with the drop in Macros and easy to edit source code, from Cover pages, Watermarks, Footers, and Main page layouts, you're in command. State SOP Home Inspection report to a Commercial ASTM standard E2018-15 custom reporting templates are limited only to your firm's needs.

Not the design type? Our team can help design any template file your company needs with complete customization.

We work with Franchises and ever small firms, from one-page layouts to a complete portfolio, we are here for you.


home inspection software

TEAMS

"TEAMS"

IspecX allows inspectors to create Agent "TEAMS" - Offices often work as teams and with ispecX the communication is as easy as assigning an agent to a team. Reports and communication are as easy as just doing things once, with our send Team function. All of the team agents have access to all team files, reports, and documents. There are no chasing down reports.

To add a Team login to your dashboard and under 'Contacts' you will see a 'Team' tab. You can select to show all existing or simply add a new Team. A great feature for Builders as well! Project managers, accounting, and general staff all have access to the projects.


Create a Team name, add the team logo, add the team email, and then select the 'Agency' the team belongs to. Now navigate to the Agents tab and select the agent you wish to add to the team. All team-related projects are sent to every team member or you can send just to the 'Teams' email address that was entered on the Team layout page.

On the Scheduler projects can be turned on and off to allow or disallow a particular project from the team. 


True 360 Integration

Easily add 360 image views to your report. With a drag and drop interface and easy tags, anyone can use this advanced technology without having to read a manual. Inspectors can easily add hotspot links to the 360 image for deficiency report links.

Out of town clients now have a visual way of attending the inspection from the report. With live room images, the deficiency details are easily located and understood with hotspot links. These links get synced to the report layout allowing clients to understand more and bother you less. A virtual Inspection report made easy. No image stitching or coding required.